I wove a few yards of fabric in shadow weave using woolen yarns I found in my stash, and from this fabric I made myself a new pullover. I haven’t made a new one in a long time because the old ones seem to last forever! Shadow weave seemed like a good choice because its mostly plain weave structure would work well with these yarns to produce a lightweight, felted fabric after wet finishing, and also because there are so many patterns you can design in shadow weave by alternating light and dark or contrasting colors of yarns. Shadow weave falls under the category of color-and-weave and is considered to be a color-and-weave effect.
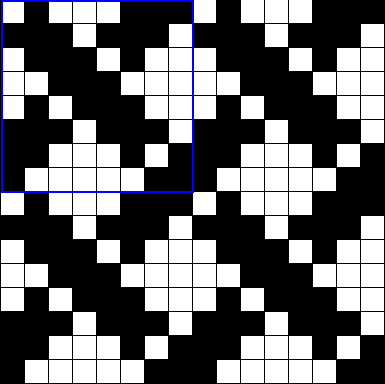
In this post I’ll be sharing photos, drafts, and notes about a couple of shadow weave samples and the pullover. I wove a sample in cotton yarn, liked the pattern a lot and decided to use it to weave the fabric for the pullover as well. Here’s a photo of the sample:

Shadow weave cotton sample designed with 7 blocks and woven on 14 shafts
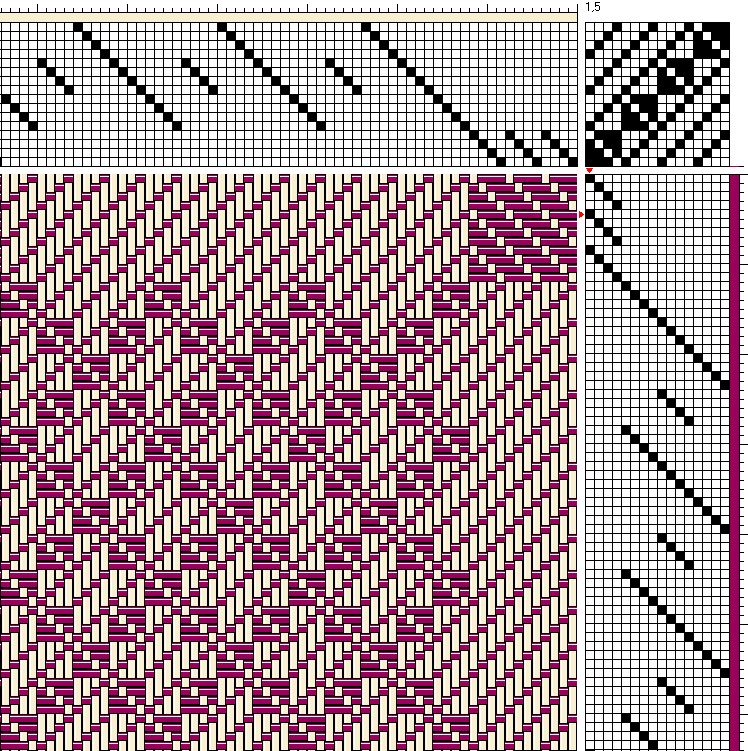
I developed the weaving draft for this shadow weave pattern that to me looks like a plaited twill, from Fig. 586 in G. H. Oelsner’s A Handbook of Weaves (downloadable at handweaving.net), described by Oelsner as a twill “arranged to produce basket or braided effects.” However, I did not weave this draft as a twill but used it as a 7-block profile draft:
PROFILE DRAFT – 7 blocks
I wrote an article in the June 2008 issue of the Complex Weavers Journal, “Shadow Weave & Log Cabin,” that describes the method I used for designing shadow with independent blocks. That’s the method I used to develop this 14-shaft thread-by-thread shadow weave draft from the 7-block profile draft:
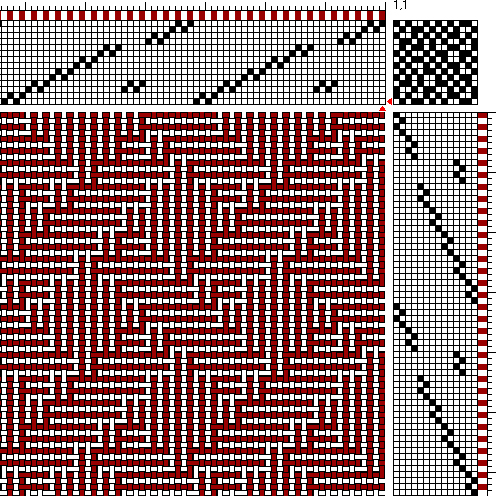
Thread-by-thread draft for 7 blocks, 14 shafts shadow weave
The red and white contrasting colors work well in the woven sample to show off the plaited/braided pattern. The colors of the woolen yarns I had available were not as contrasting, but since I wanted an understated look for my pullover I hoped it would look nice anyway and here it is:

Shadow weave woolen fabric after wet finishing, pullover, and close-up of sleeve with knitted cuff, 2014
Here are photos of the warp and a close-up of the weaving in progress on my loom to show how it looked before wet finishing:
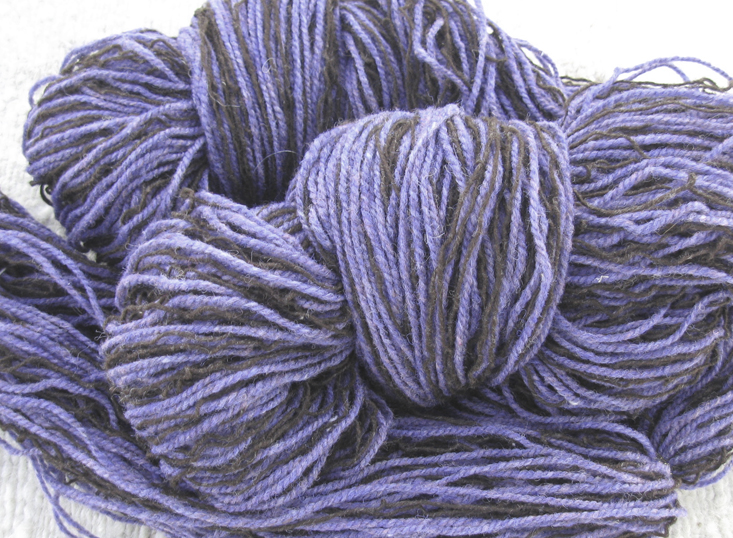
Woolen warp yarns
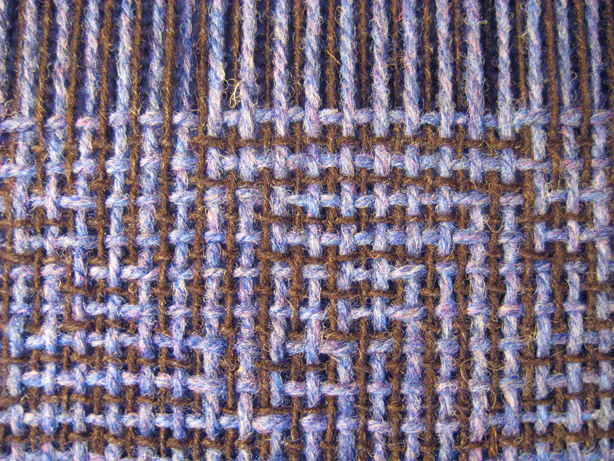
Shadow weave in woolen yarns – close-up of weaving in progress on the loom before wet finishing
Notes on weaving the fabric for the shadow weave woolen pullover: I used a 2-ply heathery purple/blue woolen yarn (272 yds./4 oz. skein, “Regal” from Briggs & Little Woolen Mills) and a beautiful, single-ply brown/black woolen yarn, I’m not sure where I bought it years ago, the label says on it “Black Welsh, 1/5-1/2 YSW.” These two yarns alternate in the warp and the weft at a sett of 8 e.p.i. and about the same p.p.i. The width of the web on the loom was 28 inches and the total woven length about 3-1/4 yards. I wet finished it in the washing machine in warm/hot water with Ivory for wool, agitated only two minutes, rinsed, and carefully spin dried it. I put it in the dryer on low heat for about 12 minutes and then let it air dry until it was completely dry. The end result was a slightly felted, lightweight fabric, 22 inches wide and 3 yards long. The construction of the pullover was fairly easy because of its simple design. I cut out the pieces, serged the raw edges, sewed the pieces together and knitted the hem, collar, and cuffs. By the way, Laura Fry is an expert on wet finishing and I treasure her book, Magic in the Water, with real woven swatches attached, great tips, and excellent information. For more about weaving with woolen yarns see one of my older posts, 2/2 Twill: Handwoven Woolen Wearables.
There are other methods of designing shadow weave than the method of using independent blocks of log cabin that I used to design the pattern for the red and white sample and the pullover. The Atwater method uses alternate threads for the basic pattern and the threads that form the “shadow” are threaded on the opposite shaft. The Powell method uses a twill-step sequence and two adjacent blocks weave together in the pattern. Carol Strickler explains it in detail in A Weaver’s Book of 8-Shaft Patterns in Chapter 6 on shadow weave. She writes about Mary M. Atwater who introduced shadow weave in the 1940’s and Harriet Tidball and Marian Powell who later developed other methods for designing the same fabric.
I like to design shadow weave the Atwater way with the help of my weaving software (Fiberworks PCW). I simply design a threading and/or treadling profile and use the extended parallel repeat to generate a complete draft with the Atwater tie-up. Below are a photo of an 8-shaft shadow weave sample and two versions of its draft that I designed and wove, similar to pattern #8-16-1 in Marian Powell’s book, 1000(+) patterns in 4, 6, and 8 Harness Shadow Weaves. I designed the Atwater method draft first by using the extended parallel repeat and then used the shaft shuffler to rearrange the shafts to come up with the Powell method draft with the Powell tie-up. These two methods produce the same results:

Shadow weave cotton sample woven on 8 shafts – designed with Atwater & Powell methods
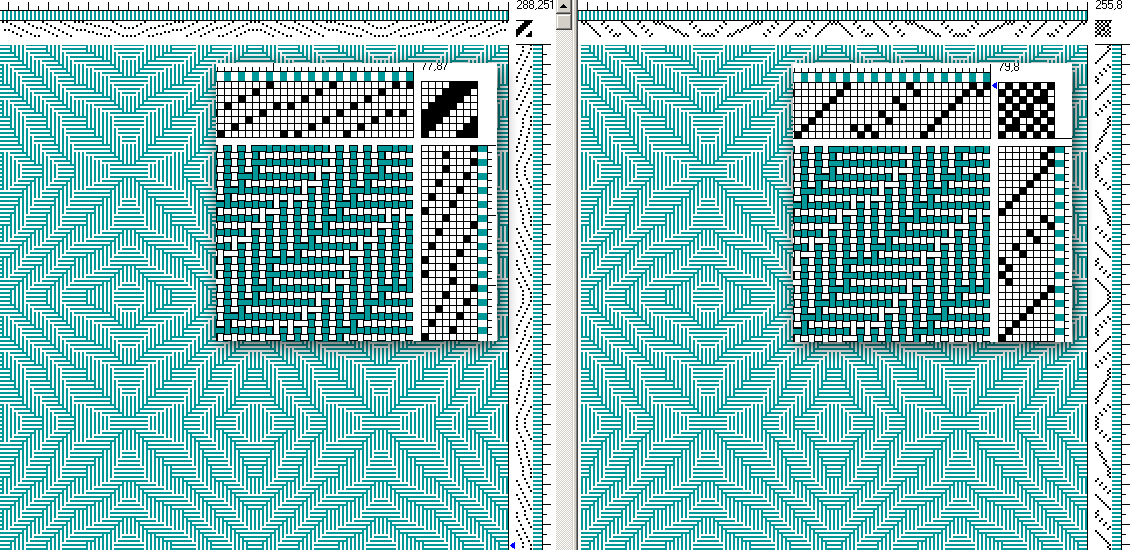
Drafts for 8-shaft shadow weave cotton sample – Atwater method on left, Powell method on right, two methods, same result!
Marian Powell first published her wonderful book in 1976 without the aid of weaving software. Some weavers find it a little hard to decipher.
Season’s Greetings and a happy and healthy New Year to my readers who visit from all corners of the world! Thank you for visiting and wandering around in my weaving universe!


")
")


, 9 x 68, 2010")

")

")


")
")

")

")


